← Home Archive Tours The Great Queensland Rail Trail Adventure About Podcast Search Also on Micro.blog
  • State of the stable 2024

    This is a regular ‘feature’ on the Internet BOB. So having prepared this on my Craft writing space, I thought I would share it here also.

    Commuter/tourer. Main ride to work, also main machine for light or credit-card touring. 1994 Shogun Alpine GT, converted to 650B. Fork by Joe Cosgrove. Downtube logo says ‘Sholto’ in memory of a friend. Love this bike and ride it just about every work day.

    Road bike. Frezoni made by Joe Cosgrove, a framebuilder who lives about 2 km from me in Brisbane Australia. Joe’s primarily known for doing the paintwork on Llewellyn bikes.

    Cyclocross/gravel bike. 2011 Cannondale CAAD-X. Just a couple of years before cyclocross bikes switched to discs. I now run a 1x setup, and it has mini-V brakes rather than cantis.

    Bikepacking bike. Based on a 2011 Specialized Carve aluminium frame. Currently has a Trifox carbon fork. Fantastic device for long steady days on a rail trail or a back road through the bush.

    Mountain bike. 2016 Kona Precept. 27.5 wheels, dual suspension. Cos singletrack is the best fun.

    Folding bike. Brompton. Cos every home needs a Brompton.

    → 3:19 PM, Jan 15
  • Trip notes from New England Cycle Trail (South)

    Day 1. Armidale to Uralla, 35km

    NECT day 1: Armidale to Uralla - Andrew D.’s 35.1 km bike ride

    Our group of four assembled in Armidale after taking various driving options to get there. I drove down from Brisbane with a 6 am start from Salisbury giving us plenty of time for coffee stops and lunch at Armidale before the short ride to Uralla in the afternoon.

    The Day 1 route into Uralla was all back roads, and stayed entirely off the New England Highway. Big tick.

    Just a couple of km on gravel roads to get us across to Thunderbolts Way for the last three km into town. Good route.

    I picked some poorly positioned motels for this trip, managed to select those well away from town centres, through not paying sufficient attention to the size of the towns and the positioning of likely dinner venues (i.e. pubs).

    Uralla had a great cafe: the Alternate Root. And we enjoyed our dinner at the Top Pub.

    Day 2. Uralla to Walcha. 62km

    NECT day 1: Armidale to Uralla - Andrew D.’s 35.1 km bike ride

    And this is where the story really starts. As I look back on this week of cycling, my strongest memories are of rolling countryside and smooth gravel roads. This day was cold and overcast, averaging 10 degrees Celsius for the day, but my abiding memory is of the colours of the leaves and the gentle rolling hills.

    After a short climb out of Uralla, we left on Gostwyck Rd, past some roadworks which made a clay road quite sticky. All of us got chunky bits of gravel sprayed over the lower parts of our bikes. But once through the roadworks, the roads dried out and conditions were cool but near perfect.

    At Gostwyck we were entranced by the avenues of elms leading to All Saints Chapel, a picture-perfect place for a wedding I’m sure. We rolled south, climbing and descending throughout the morning.

    Closer to Walcha we got back on some bitumen for a nice roll into town, and some lunch at Cafe Graze. This was a great morning’s ride, with enough challenge in climbing to make us hungry for lunch, enough rolling downhill to enjoy after any climb, and plenty of amazing autumn colours of reds and yellows in the New England foliage. Lots of oaks, elms and liquid amber trees, showing off their decidousness.

    Day 3. Walcha to Tamworth. 93km

    NECT day 3 Walcha to Tamworth - Andrew D.’s 92.8 km bike ride

    This was a highly memorable day on the bike, with a descent nearly 30km, and a loss of 600m of altitude over the whole day’s ride.

    The first third of the ride was up and down out of Walcha, with a turn off onto Scrubby Gully Rd. Even early on there was a magnificent descent down to the MacDonald River. The route then climbed away, and then back down to the river a second time.

    This was where we got our feet wet. The route crosses the river on Surveyors Creek Rd, just before getting to Woolbrook. Belinda lost one of her croc sandals in the river, which certainly was a tragic moment in fashion.

    After Woolbrook, we cruised and hollered and grinned on our way down the valleys created by Jamiesons Creek and then the Cockburn River, all the way to a late lunch at Kootingal (72km)

    My route assessments let us down at this point I think. Instead of pulling up at Kootingal, we braved the weekday afternoon traffic into Tamworth, a busy city with many trucks and buses. Our motel was on the New England Highway, which was also hard to get too.

    Day 4. Tamworth to Quirindi. 115km.

    NECT day 4: Tamworth to Quirindi - Andrew D.’s 115.6 km bike ride

    This was the “Queen Stage” of our trip. I was a little concerned about my ability to ride the whole route and still finish in daylight, because there was a substantial amount of climbing, and because the previous day a ride just short of 100km saw us get into town with only an hour of sunlight to spare.

    So we set off from Tamworth and rode a normal pace through to lunch at Nundle. On the way we rode through an historic goldmining era place with the charming name of Bowling Alley Point.

    The steady climb up the Pool River valley, past Chaffey Dam, was one thing. We gained 200m of elevation.

    But straight out of lunch (at the charming small town of Nundle) it was a false flat bitumen road leading to the only sustained climbing section of the whole week (for me).

    Fortunately the climb on Old Wallabadah Rd was steady and pretty scenic, distracting me from the pain in my legs.

    Eventually we reached Wallabadah, after a short but stimulating ride along the New England Highway. The last bitumen section riding west to Quirindi was ridden at breakneck pace, as we chased the sun going down before our eyes.

    Day 5. Quirindi to Tamworth.

    Route planned

    NECT day 5 Quirindi to Tamworth - A bike ride in Quirindi, NSW

    Our route as ridden

    NECT Day 5: Quirindi to Tamworth - Andrew D.’s 67.4 km bike ride

    Our day started with a little adventure. Just leaving Quirindi we turned right onto Bells Gate Rd, which our GPX route showed as a minor road which would link up to Black Gully Rd as a back roads route into Werris Creek, keeping us off the major through routes.

    However, as we crossed the railway line after 7.5km of the day’s ride, we lost the trail. The road we were on became a farm driveway, and the GPX track was telling us to ride where there didn’t seem to be any road. Eventually Derek looked further along and saw a farm track which disappeared over a small rise. So we gulped hard and found a way across a small gully to link up with the double track.

    It was only a couple of km later that the double track became a proper gravel road again, but for all that time I had a gnawing feeling in the pit of my stomach.

    The wisdom of this route at keeping us away from the main road (Werris Creek Road) was made clear to us all, after our morning tea stop in Werris Creek.

    We had 26km on the main road, and it was not a nice ride. Big trucks going at 100km/h only a couple of metres from you is never fun.

    We got to Duri and thankfully our route planners had found another quiet road to get us all the way into Tamworth. A bit of bike path work saw us all the way into Tamworth’s very busy CBD.

    The New England Cycle Trail (south) is a great ride. If I was doing it again I would stay in Kootingal rather than Tamworth on our way south, and I would look extra hard for any connecting back roads between Werris Creek and Duri, cos that road was no fun at all.

    For me, the train trip from Tamworth back up to Armidale was a delight, although the bike box supplied by NSW TrainLink was one of the smallest I’ve ever used, and required A LOT of bike disassembly.

    → 2:32 PM, Jun 14
  • On the subject of how much you spent on your bike

    Here is an unpopular or perhaps unwelcome thought.

    Imagine you are riding along on your bike tomorrow. And for whatever reason you lose control and crash.

    Firstly, I hope you’re OK, and you haven’t damaged yourself too much. Your well-being is the most important thing to consider in this scenario.

    So you are OK, now what’s the damage to your bike?

    Oh. That looks expensive. I’m not sure that’s fixable.

    Here’s the point where my opinion becomes unpopular.

    Many people ride expensive bikes. That’s fine, we have varying capacity to pay. Spending $10,000 on a bike can be absolutely fine if you can afford it.

    But if you are in an accident and your bike gets wrecked, or if you are sitting at a cafe and your bike gets nicked, and you can’t afford to replace your bike, then you spent too much on your bike.

    Bicycles aren’t “forever”. I’ve had my favourite bike for 29 years, but it’s still just a bike.

    Yes, you can insure your bike. I recently got a quote to insure my road bike, one of my seven bikes. I don’t know what it would be worth to replace, but a new custom steel frame would be around $3500. Insurance against theft or accidental damage will cost $20 per month, or about $240 per annum.

    I’ve got seven bikes, which ones should I insure? And what’s the value proposition here?

    Insurance is a scam which has all of us bluffed when it comes to high-consequence items in our lives (houses, cars, medical bills).

    But for bikes, it’s easy. Don’t spend more on a bike than you would be willing to pay again the very next day if it disappeared.

    → 2:54 PM, Feb 15
  • A bike is more than the sum of its parts: my Carve 29er

    _2025 Update: _ Some of the minutae about bags and loading the bike up for a trip have changed over time. See the latest version, at the end of the article.

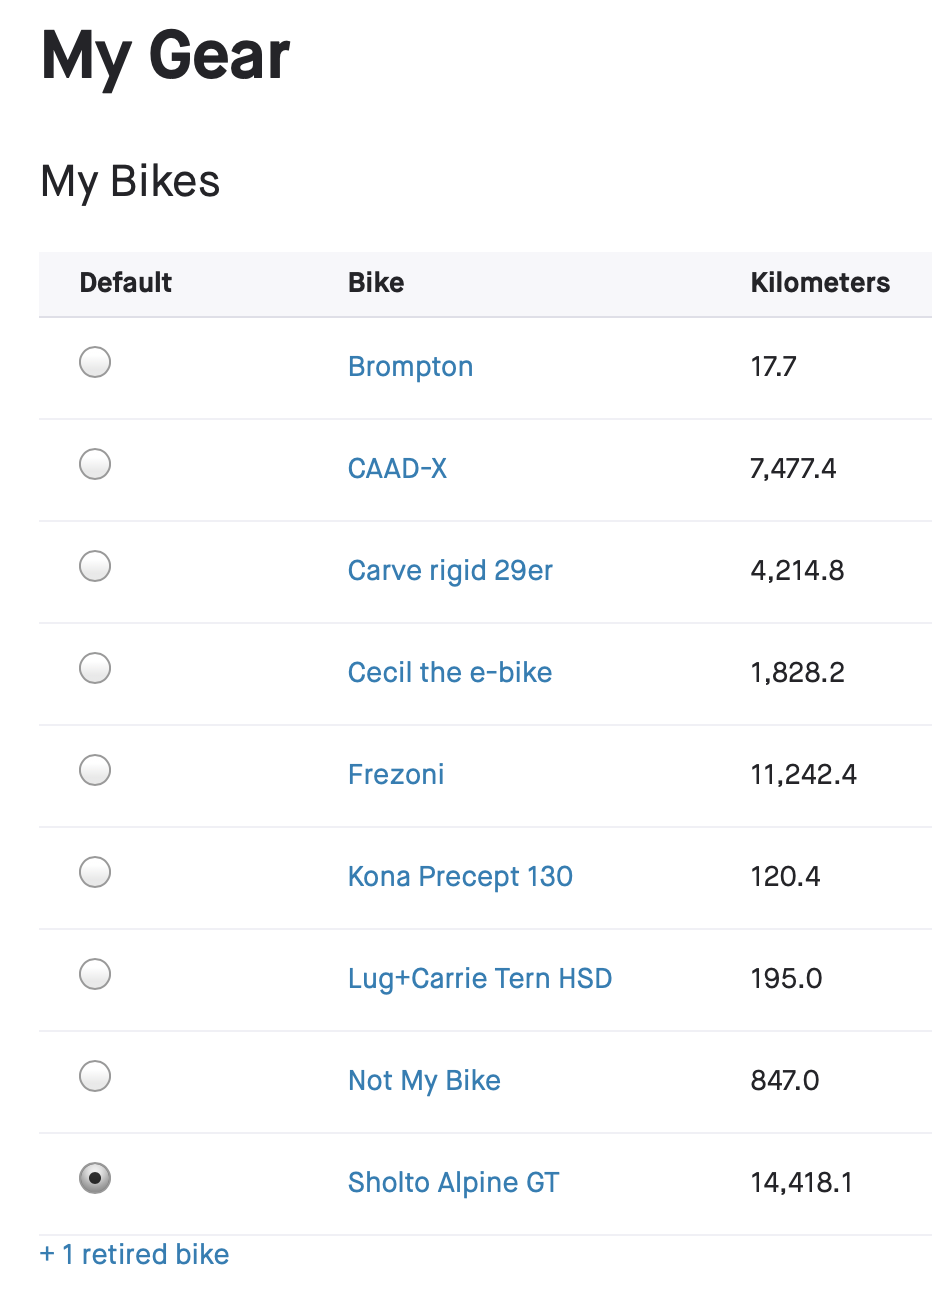
    If I look at my stable of bikes, and how much each one gets used (available on Strava), you might get the feeling that my Carve 29er isn’t one that I really like.

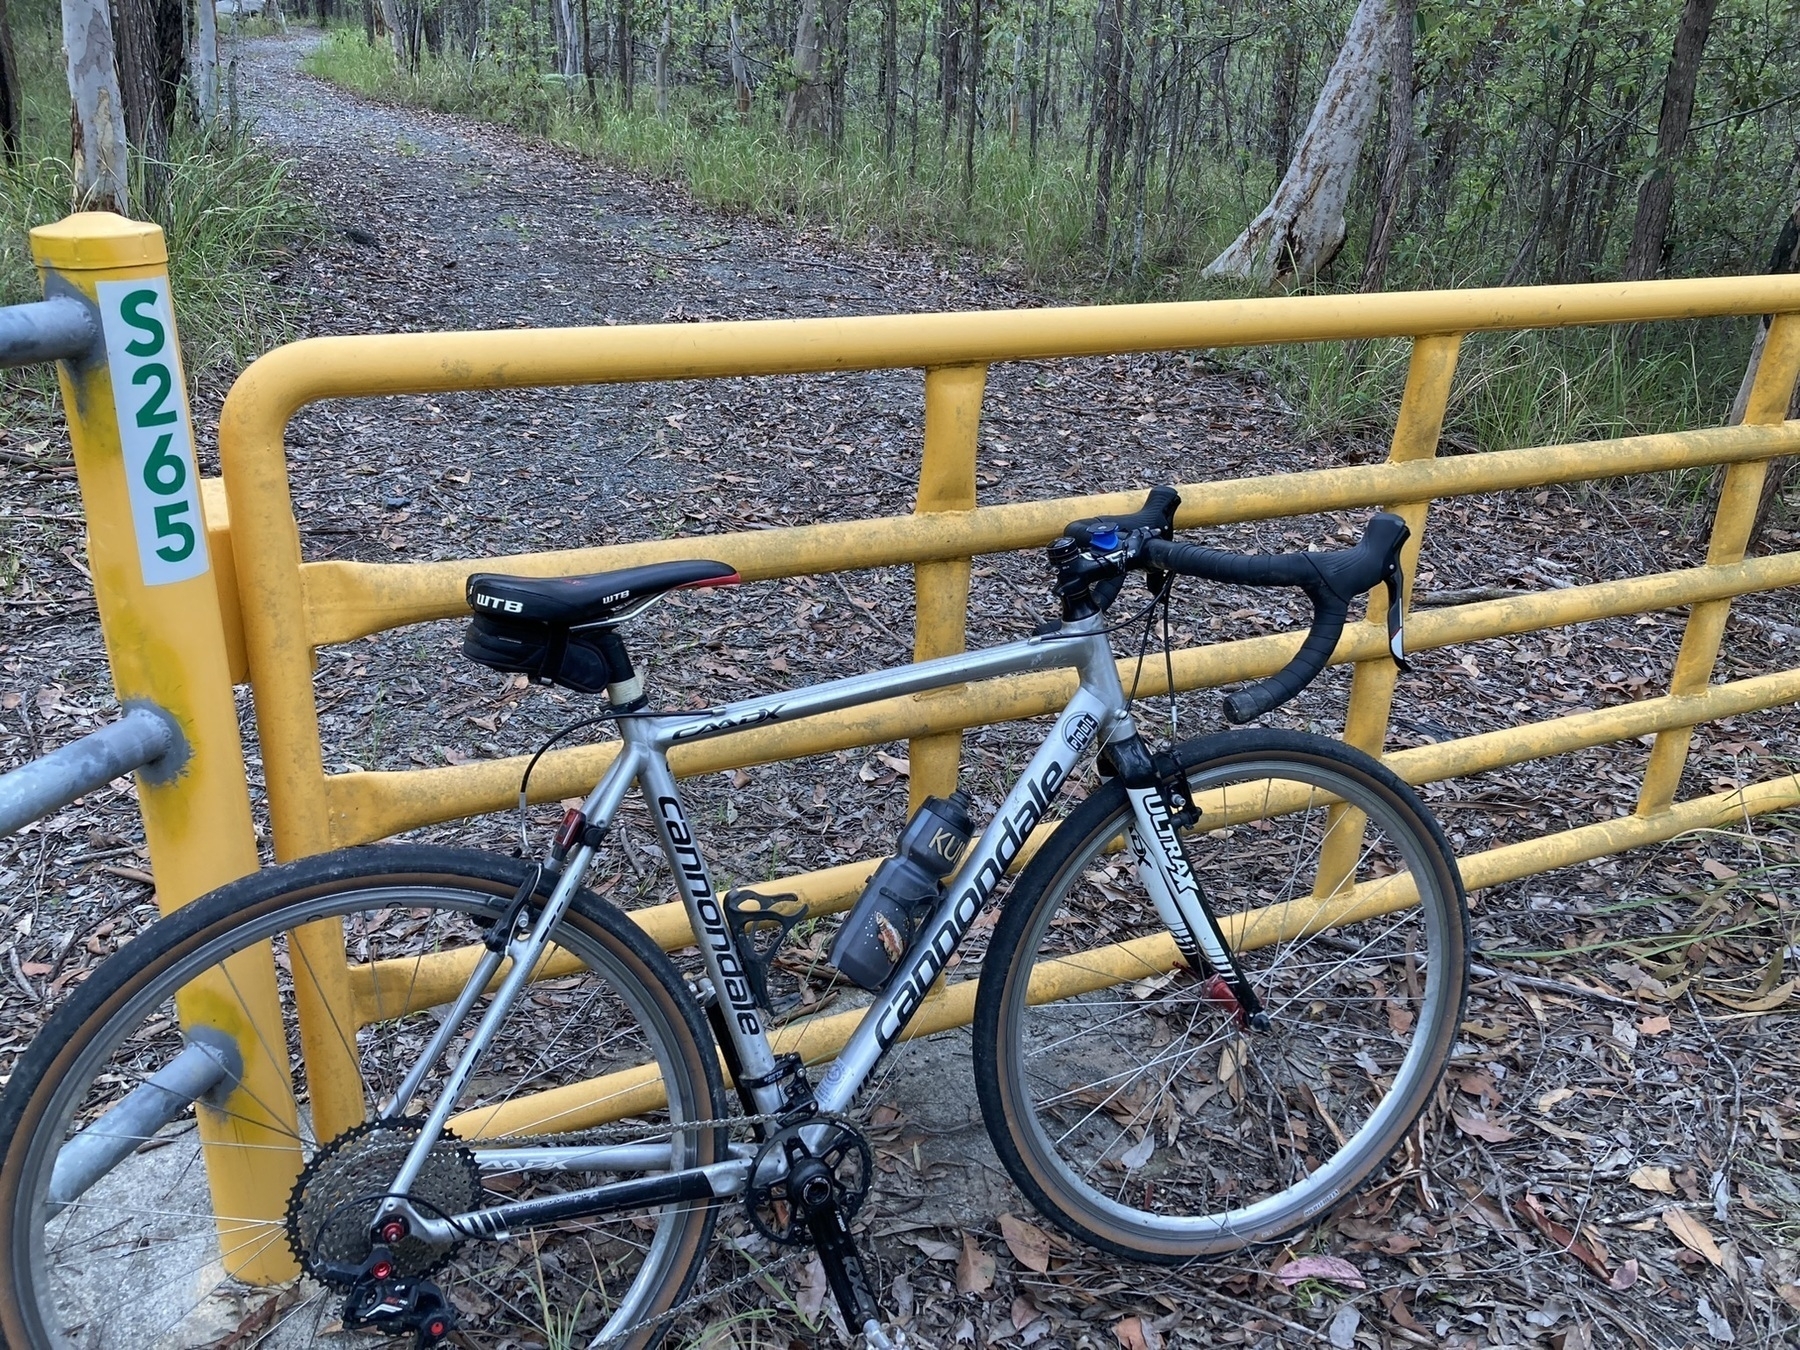
    It languishes down in fourth place with ‘only’ 4000-ish km, trailing the Sholto bike, the Frezoni, and my cyclocross/gravel bike, the CAAD-X.

    But the Carve 29er occupies a very special place in my memories. It’s the bike on which I have bikepacking adventures.

    Ten years ago when I started getting into this new style of cycle touring, it was only natural to fit some bags to my hardtail 29er and get rolling.

    My Carve has an origin story that I’m going to suggest is unlike most other bikes, and it’s going to sound weird when I tell it.

    In 2011 I had bought a Cannondale RZ OneTwenty dual-suspension mountain bike. And I really enjoyed that bike, it was great fun on all the trails around Brisbane and SEQ. And the bestest best bit of that excellent bike was its Lefty fork.

    The Lefty is a strange beast, and unless you have ridden a bike with a Lefty, I don’t expect you to understand. But a well-tuned Lefty on a trail or XC-style mtb is a total joy. Super responsive, lightweight, laterally stiff, just a really cool thing to have on the front of your dually.

    And one day I am idly being idle and I noticed a secondhand Lefty for sale on eBay. I put a bid on it, not really expecting that my offer would win the bid. Which it did. At this remove I don’t remember what I paid for the Lefty, but I think less than $200. And those things were very spendy back in the day.

    Ok, so I’ve got a Lefty.

    And it sits in my bike shed, mocking me, for about six months.

    Next thing my friend JD has a Specialized Carve 29er frame for sale. JD had bought the Carve as a complete bike from Epic Cycles only a few months before, but then had been seduced by a gorgeous Ritchey P29 steel frame in red, white and blue. So JD swapped all the components off the Carve onto his new Ritchey.

    And the Carve frame in basic black was left behind. It’s an aluminium 29er frame from 2011-12. The geometry of the time is very dated now (70 degree head angle anyone?) but it still works great on dirt back roads and most point-to-point style trails.

    So I thought: that’s a low cost way to get the Lefty onto a bike, and perhaps get into bikepacking. Even though there are easily foreseeable downsides to having a Lefty on a bikepacking steed.

    I bought a Shimano SLX groupset (drivetrain, shifters and brakes), hunted around for bits and pieces, and snagged a pair of wheels from Aiden Lefman when I approached him for help in servicing and fitting the Lefty (Aido runs a mtb suspension specialist firm, Cyclinic).

    And there it was: a matte black medium sized 29er hardtail, with out-of-place Cannondale Lefty fork.

    I did a few micro-adventures on it, but its first starring role was in 2014 when I rode the Munda Biddi Trail.

    And ever since then, most every big adventure I’ve been on (except for two) has been on the Carve.

    And as a hardtail mtb for having adventures on, it has been just about flawless.

    Over time, the Lefty became slightly troublesome. Lefty forks have an issue known as ‘bearing migration’.

    When the bearings migrate on your Lefty, you can go from 110mm of travel to 50mm of travel in hardly any time. Or worse.

    Many Lefty owners get used to fixing this issue while out on the trail. I never got used to fixing it all, regardless of on the trail or in my shed.

    Before a bike packing trip I would take the Carve to my mechanic, and ensure (among other things) that the Lefty had full travel, and off I would go. Sometimes it would lose a little bit of travel over a couple of weeks, but it never became a major concern.

    But when I took the Carve to Dave (my mechanic) on my return from the Mawson Trail, he called ‘time’ on the Lefty. Too much trouble with the bearing migration, and performance in absorbing bumps had also got worse over time.

    “Just find a carbon fork for this bike, you only use it for bikepacking so it doesn’t really need suspension. A carbon fork will make the bike feel lighter and more lively,” Dave said.

    I agreed. He was right.

    Carbon forks for 29er mountain bikes are pretty easy to find, but also can be somewhat expensive. I’m pretty wary of over-capitalising any of my bikes, and this one in particular would not gain one dollar of resale value by being shod with a fancy Whisky or Salsa fork.

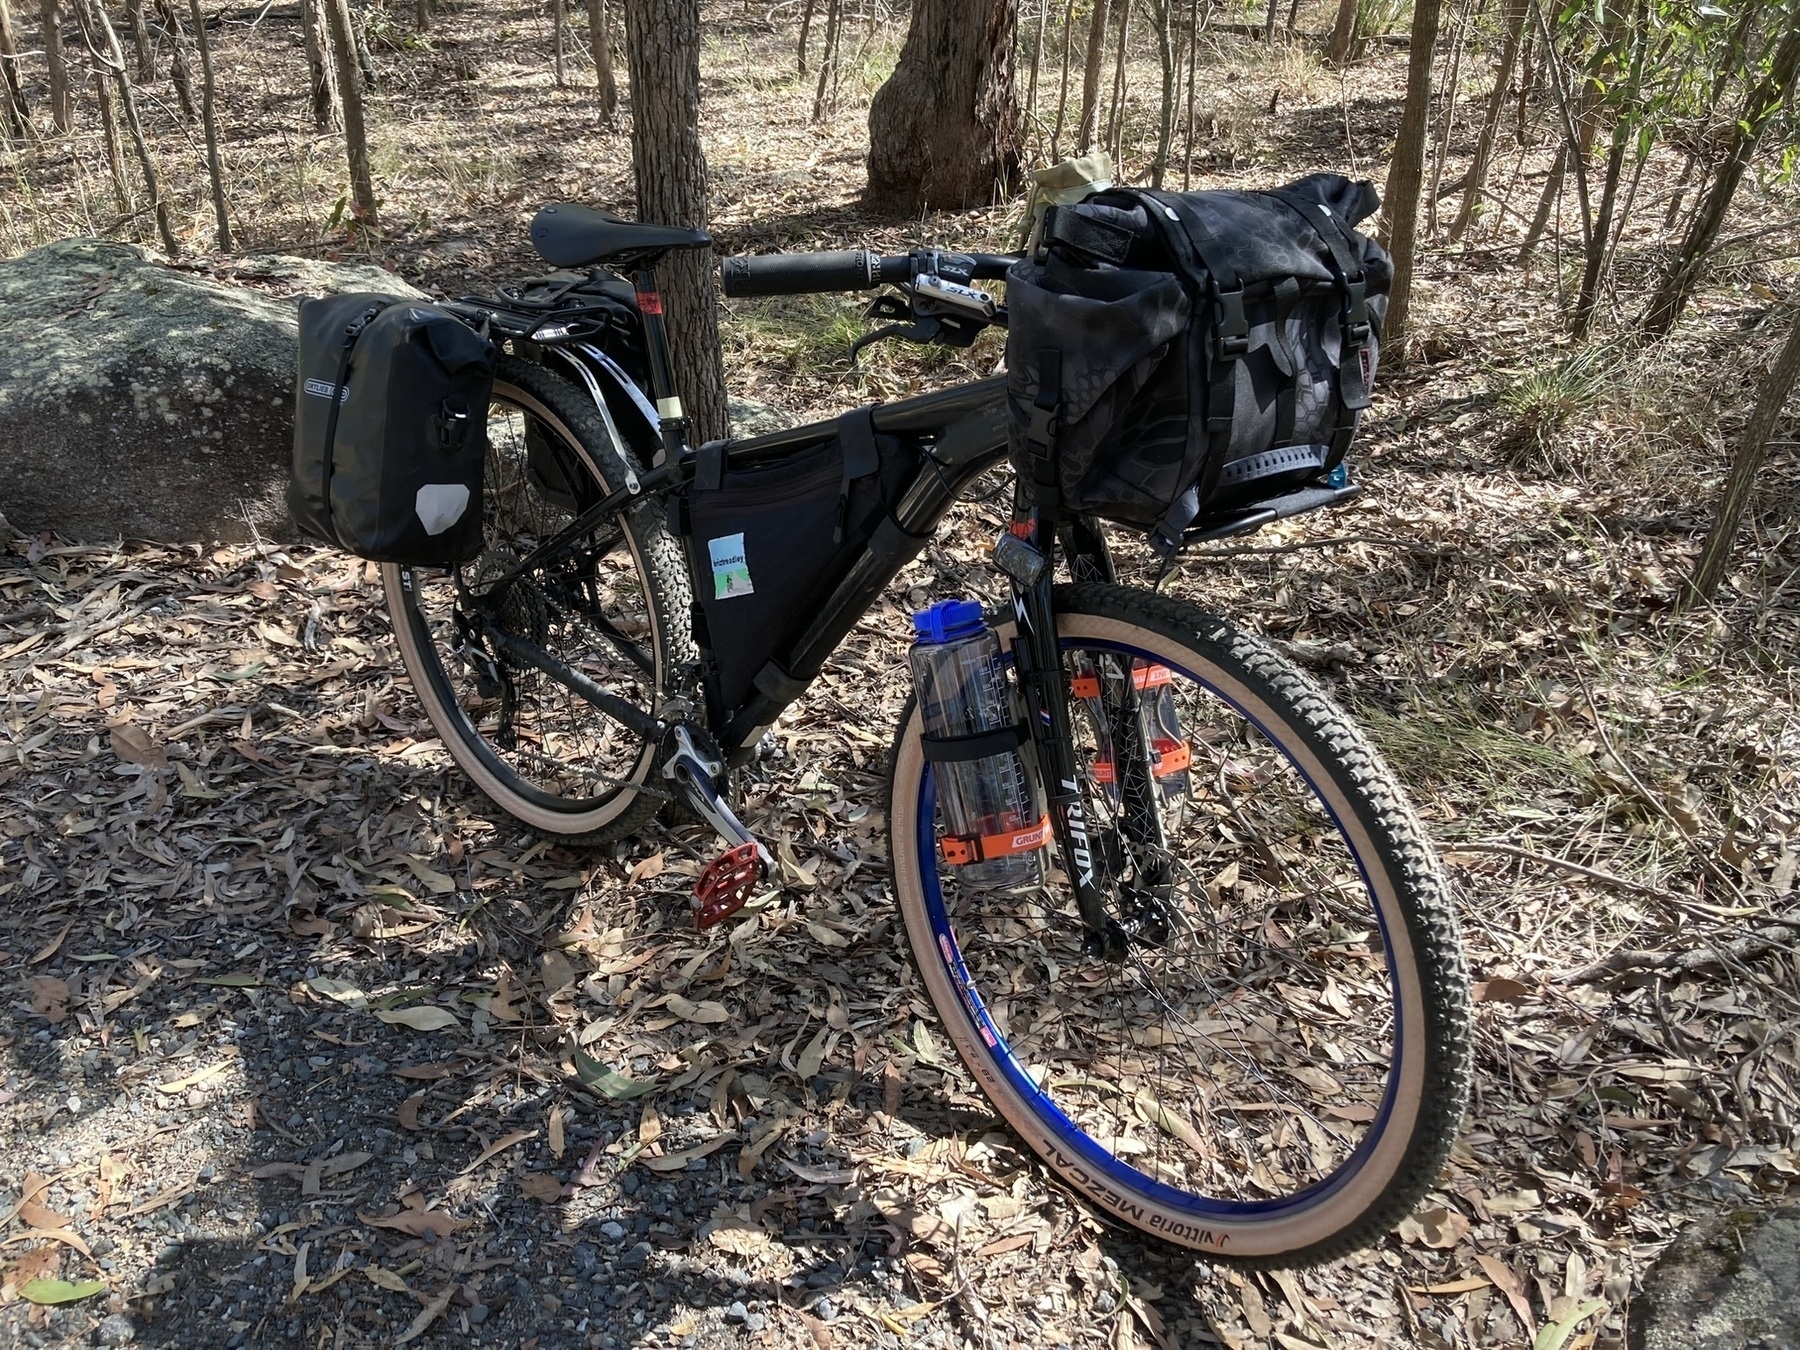
    So after a cautious search on AliExpress, I purchased a Trifox brand carbon fork, and Dave installed it.

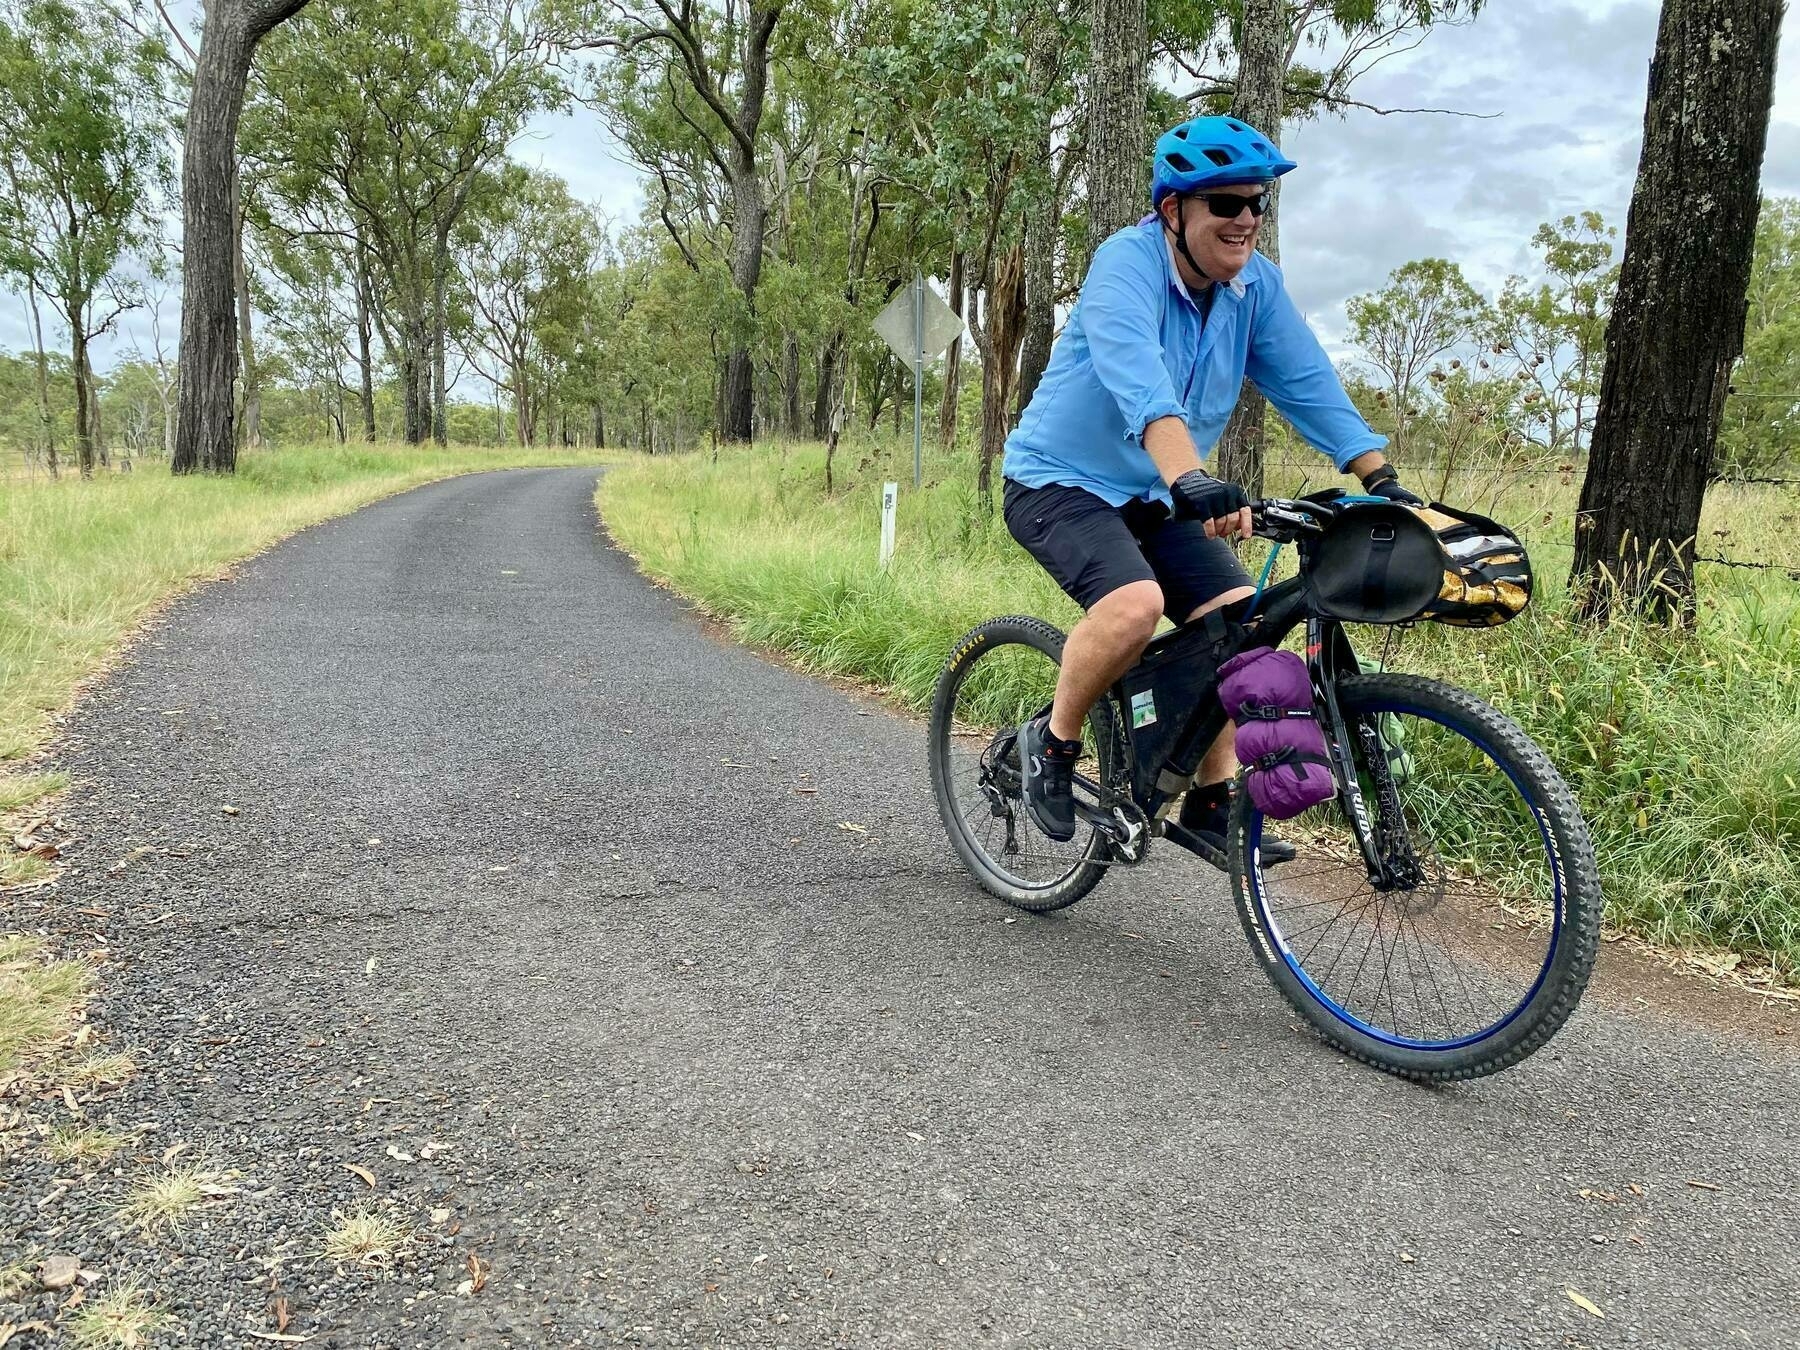
    So far (several quite taxing day rides, and one overnighter along the BVRT and South Burnett back roads) so good. The bike does feel lighter, although I should qualify that statement cos it has not yet had a full camping load on board.

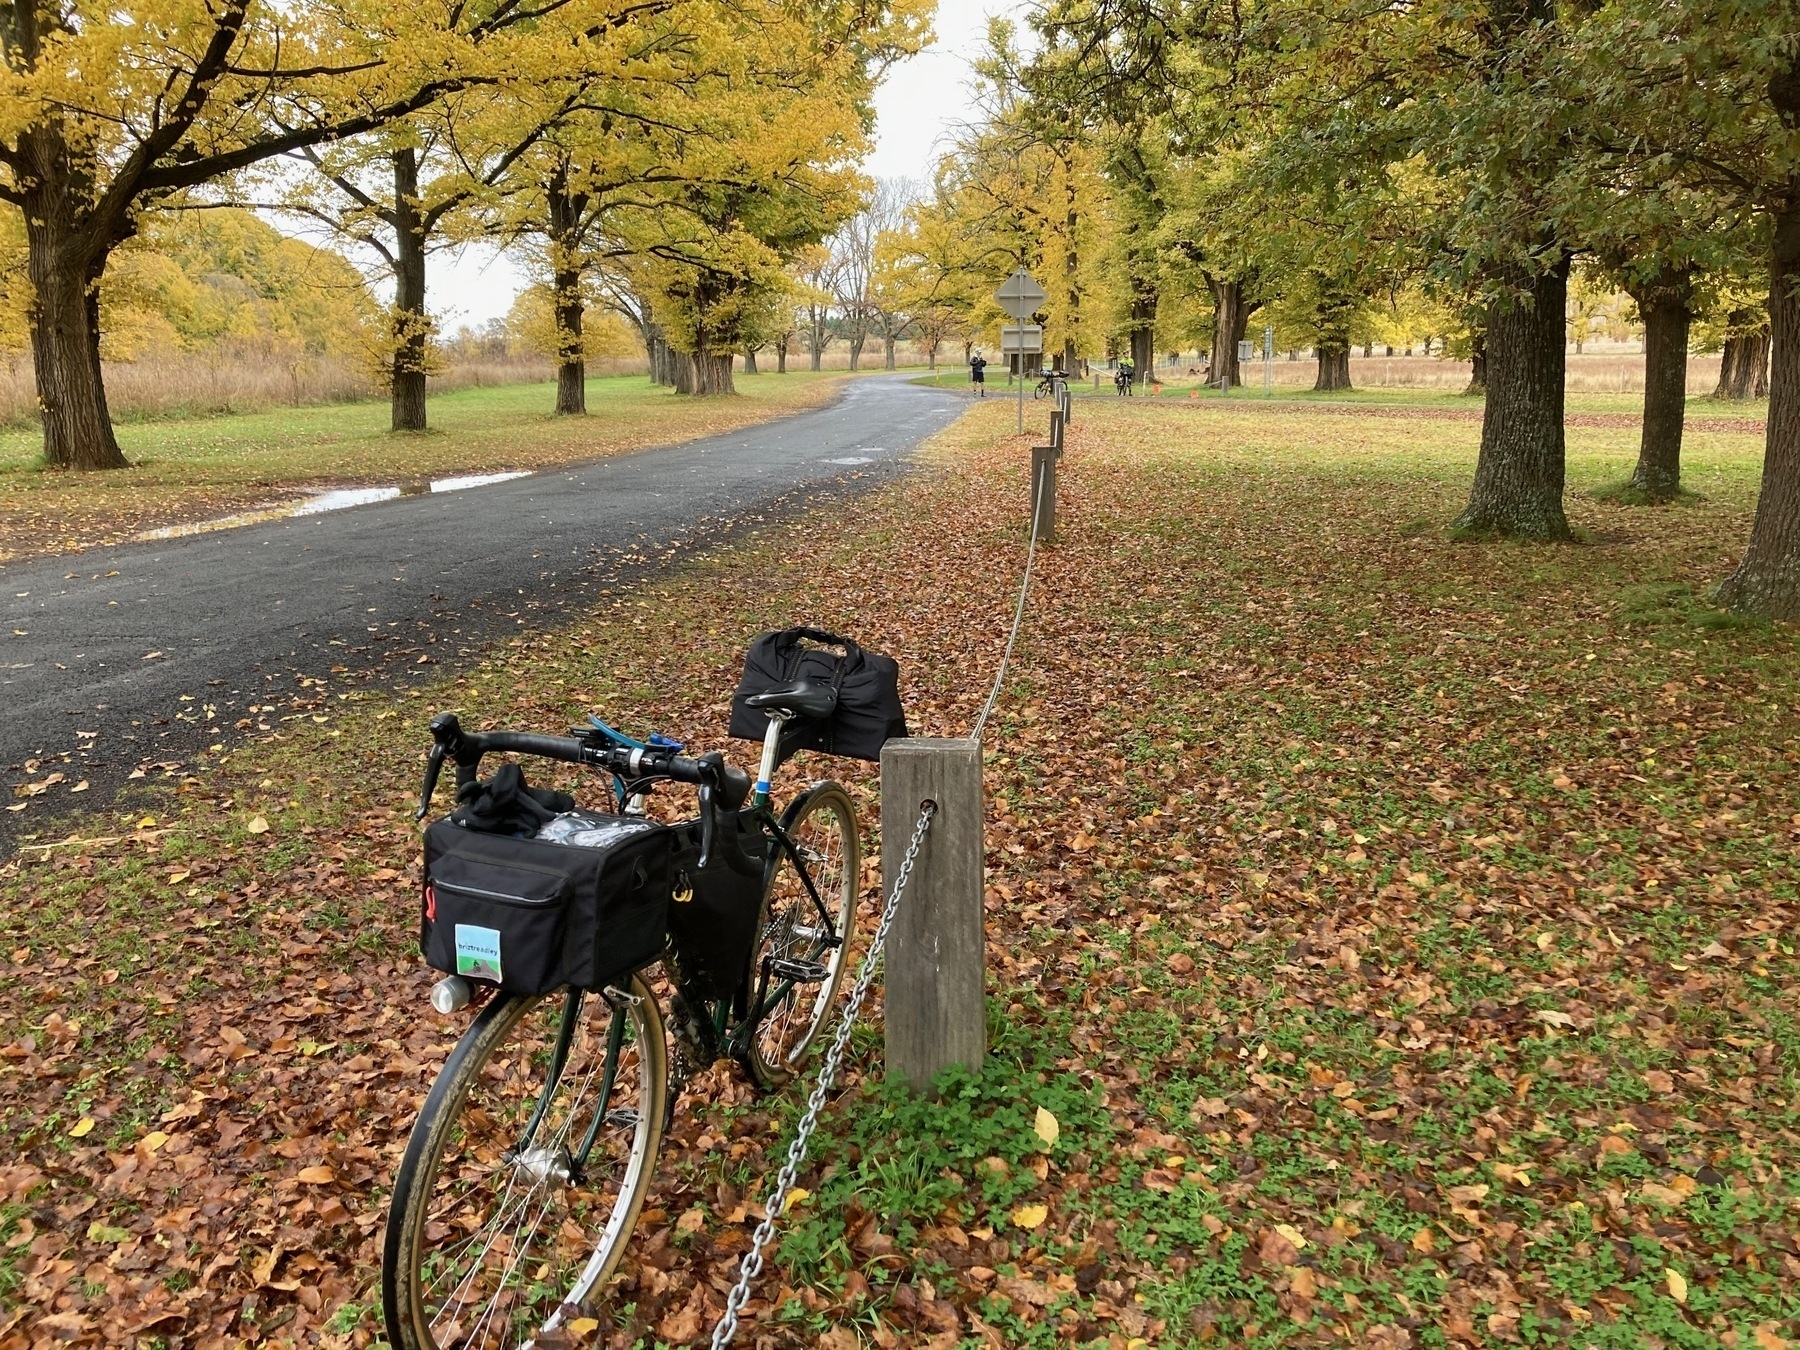
    The Trifox fork didn’t have adventure mounts, so thanks to BarYak for producing the Mule, a system for attaching mounting points. I’ve got the Blackburn Outpost cargo cages, and on a recent overnighter the BarYak - Blackburn combo worked well.

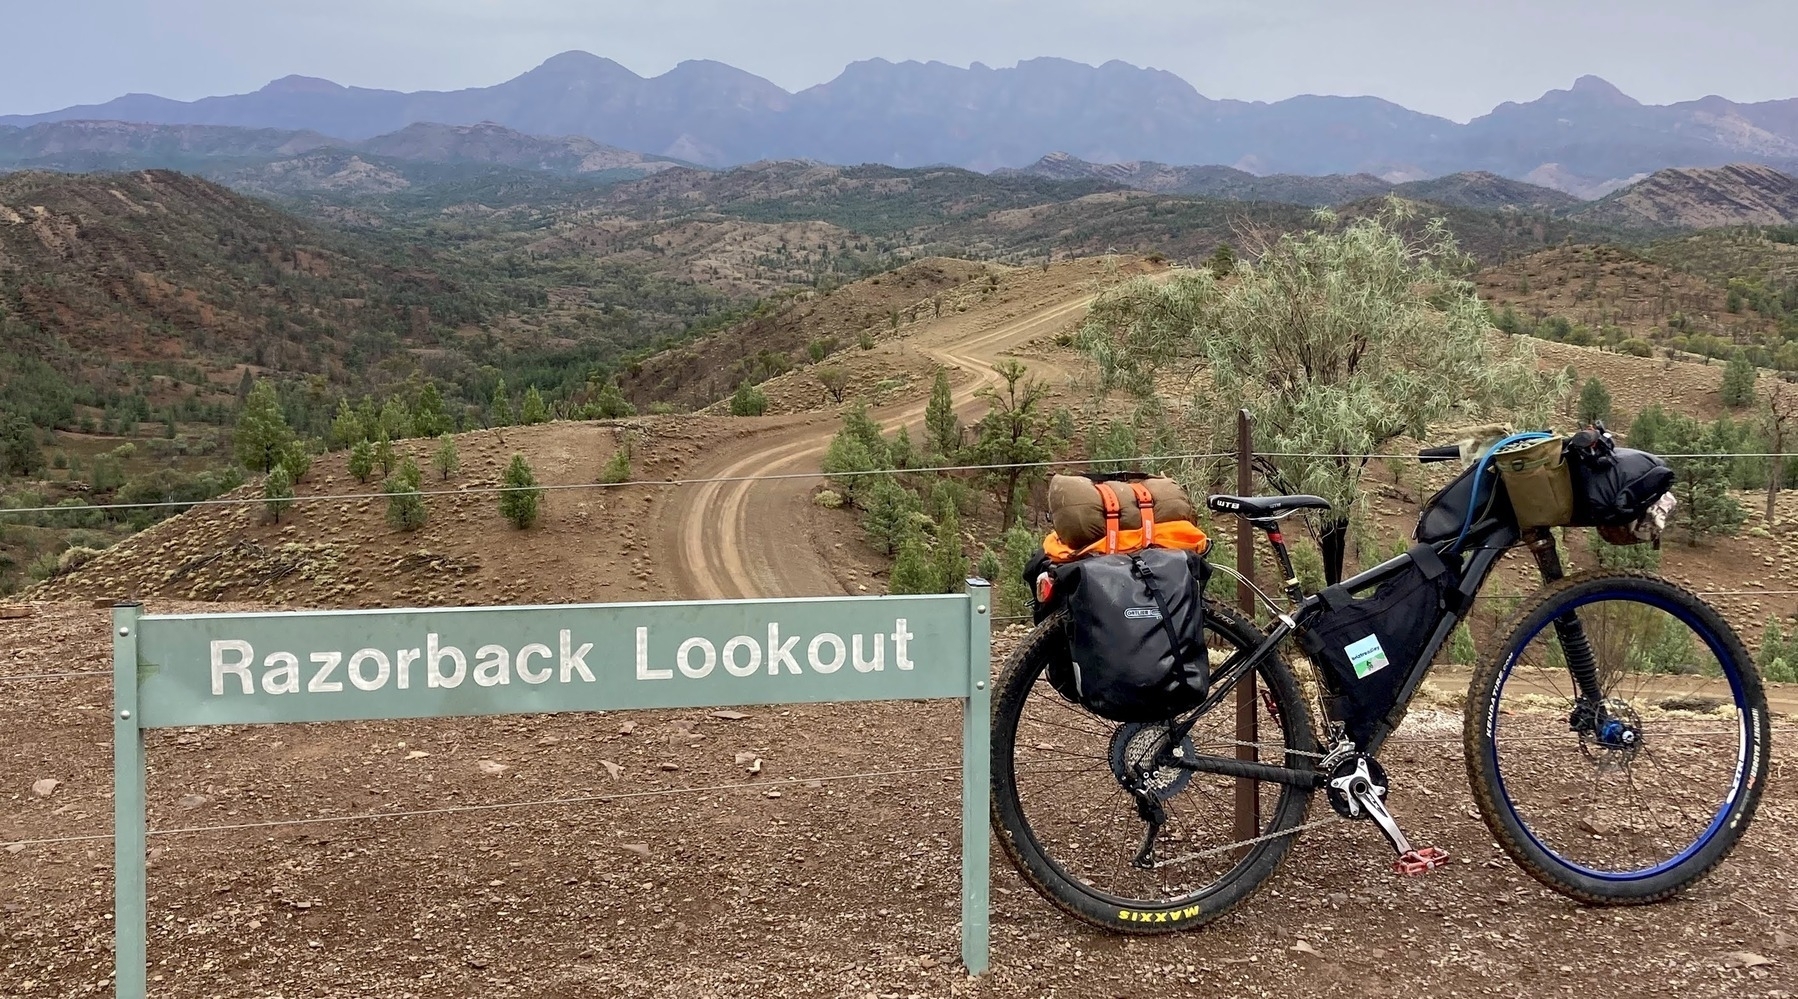
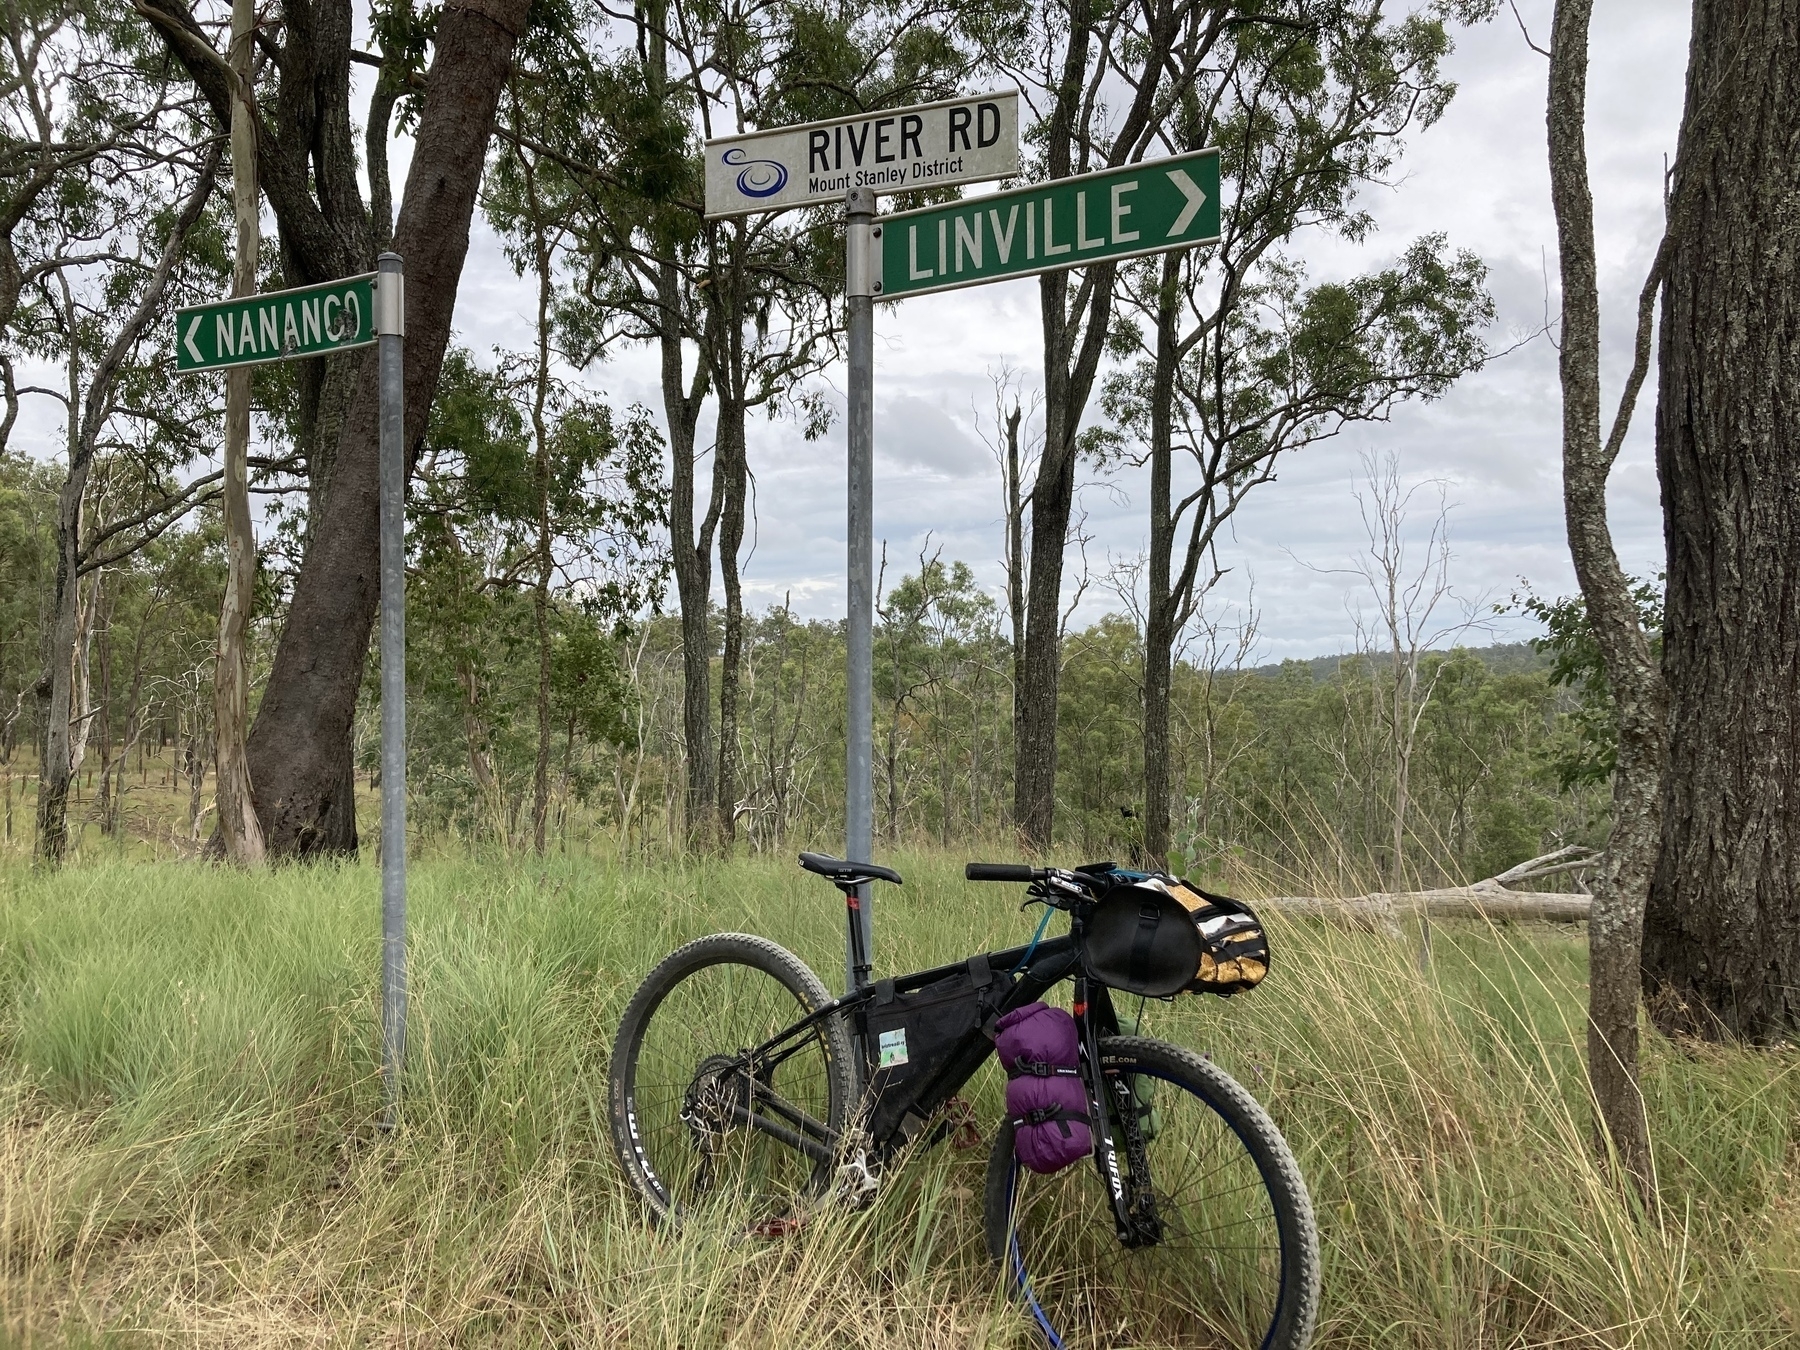
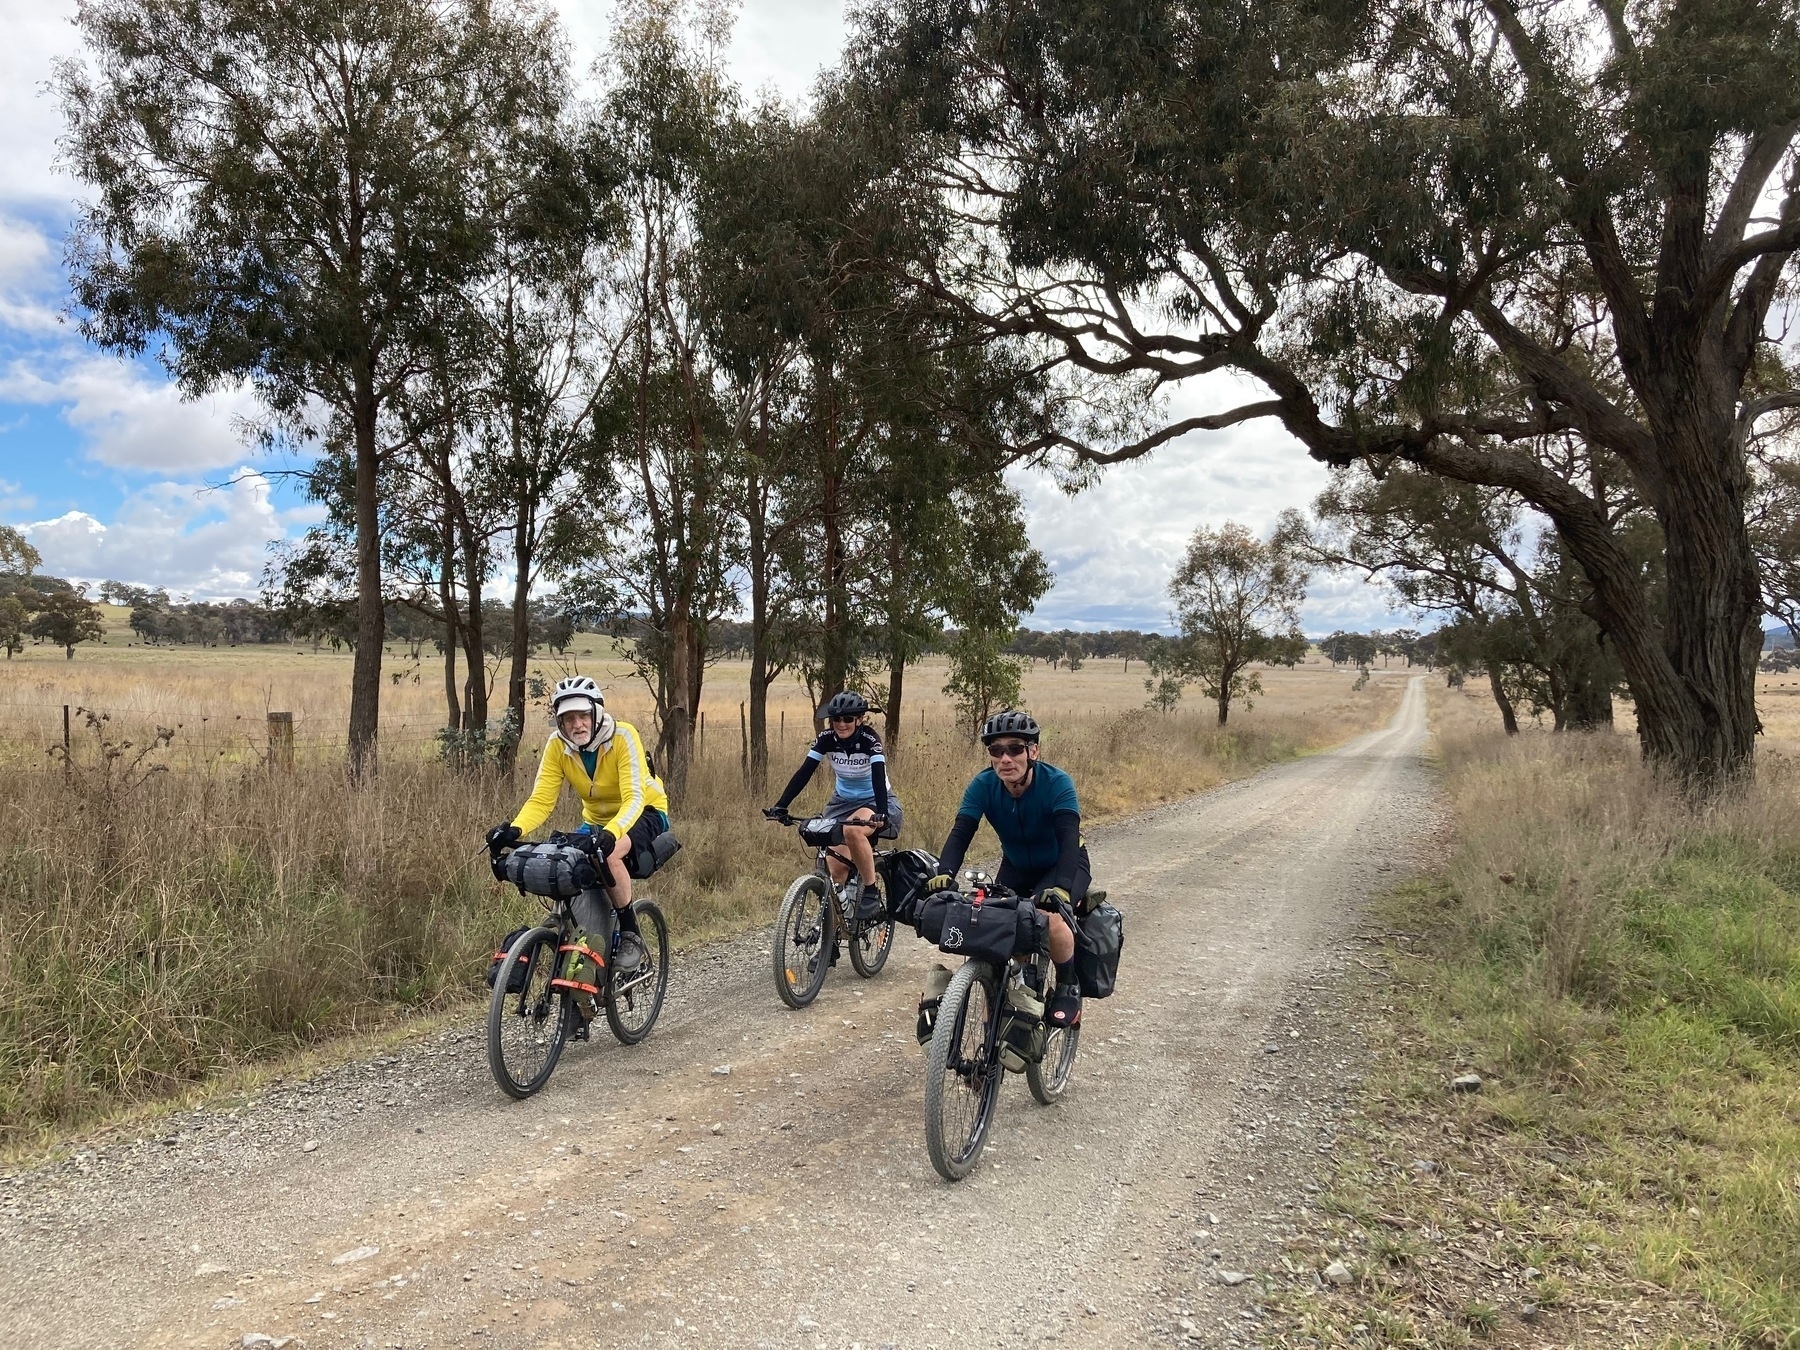
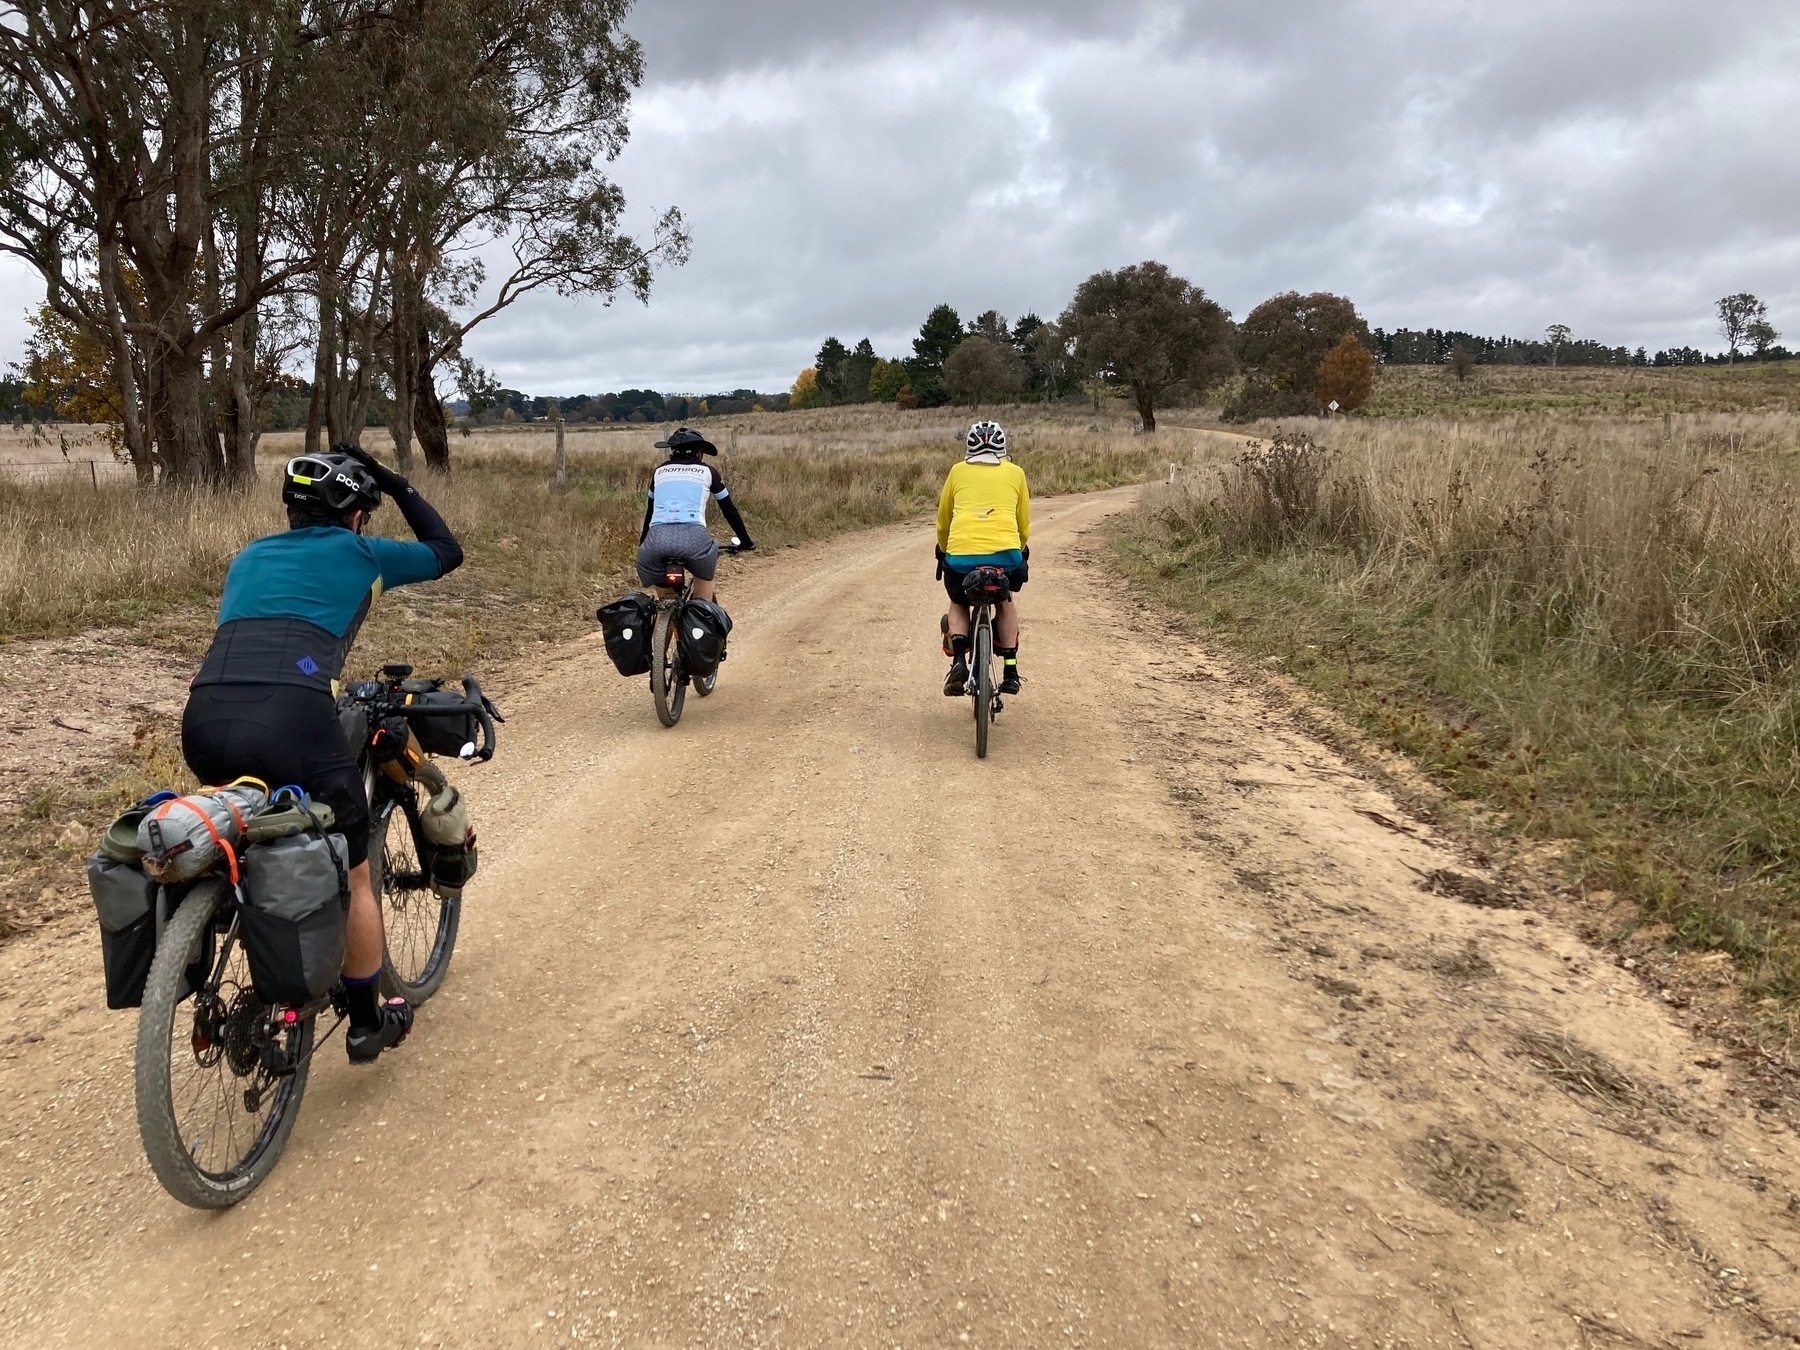
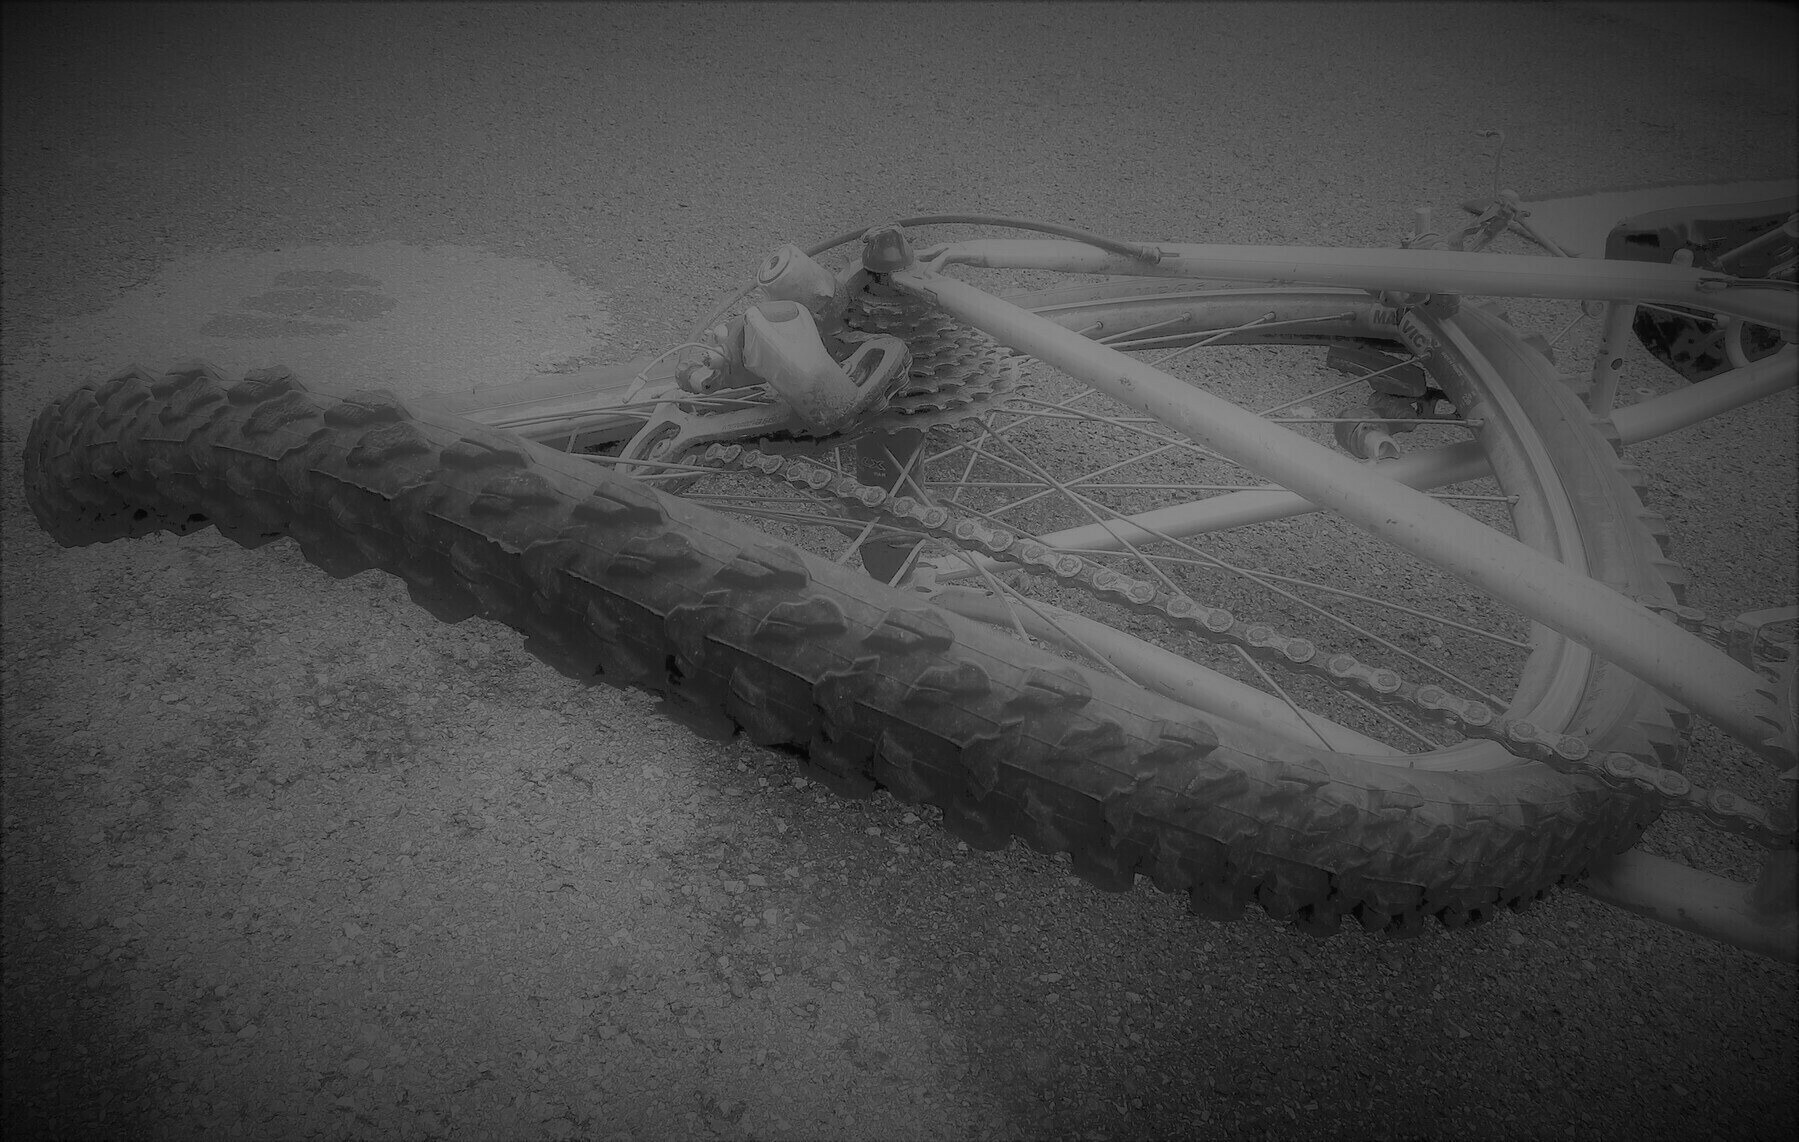
    Over the years I have used a variety of bags on the Carve to carry the gear you need for travelling around by bike. I have setup routines for pub overnighters, for full-on two-week-long camping trips, and everything in-between. See the photo at the top of this post as one example.

    My favourite bags for the Carve have been the two frame bags I’ve used.

    My original frame bag was made for me by my friend Dean. We used two existing nylon bag, of the giveaway type. One side was a Brisbane City Council City Cycle bag, and the other was a Griffith Unversity bag. The resulting frame bag had a real ‘rasta’ flavour with green edging, yellow one side and red the other.

    After a couple of years the CityCycle side gave way … it was made from a very cheap nylon. So I asked my friend Brad to make me another bag, this time from cordura, and I have been using that one ever since. It fits a water bladder with about 2.5 litres of water quite comfortably, along with a pump and a few tools.

    The rest of the kit varies. I mostly use a rear rack with bags hanging off it, rather than a large seat bag, cos my short legs (I have Duck’s Disease) don’t give me all that much clearance from the seat down to the tyre. And upfront I often use a Azur handlebar roll that came my way to review for Australian MTB mag.

    I like the way the Carve rides when loaded. Without a load it was a bit twitchy on singletrack in its Lefty days. These days it doesn’t have a suspension fork, so the dampening effect on the handling of all the extra load won’t be there in quite the same way.

    The Carve is also I think the epitome of the idea that a bikepacking bike doesn’t need to be flashy to be good. The Carve’s aluminium frame was literally a castoff from a friend who didn’t want it.

    But in the intervening 10 years it has been a brilliant machine to own and ride. We’re still on the original drivetrain (more or less), original brakes, original handlebar (a SQ Labs trekking bar). And with one tiny exception (when I buckled a rear wheel one day) the Carve has always got me where I wanted or need to go each day that I’ve set out on it.

    So that’s a pretty good endorsement. I’m hoping for another 10 years of bikepacking adventures on it.

    **What’s different at the start of 2025: ** I rode the Carve with Trifox fork on a rail trail tour from Ipswich to Marybrough in August 2023, and on the Munda Biddi Trail in September/October 2024. The main change from previous setups was at the front of the bike. I bought a Jack the Rack in the Kickstarter, and it gives a great platform for a front bag. My bag is from Buffalo Bags in Thailand … it is called a Big Buffalo, but mine is the smallest size. I run a couple of 1.5 Litre water bottles on the Blackburn Outpost cages on the forks, which gives me room in the frame bag for weighty stuff such as my travel CPAP machine and its battery.

    → 5:26 PM, Jan 27
  • Can I just post this here cos

    1. It’s awesome
    2. I want to remember it often
    3. I agree with every single line in it.

    Surly Bikes: Some answers to just about any bike forum post

    → 7:37 AM, Jan 26
  • Arrows in my quiver, horses in my stable

    A little while ago on this very website, I answered the question that everybody wants to know: “How many bikes do I need?”

    I’ve just added a new bike to my shed, so I thought it might be fun to look at the principle stated in that earlier article and see how it applies to the bikes I currently own.

    Controversially, my thesis discards N+1 as a guide for working out how many bikes you need, and replaces it with the idea that the right number of bikes is one.

    So if you want to go road riding, you need one bike, a road bike.

    If you want go mountain biking, you need one bike, a mountain bike.

    If you want to race cyclocross / go touring or bikepacking / travel with a bike, you get the point.

    At the moment, the number of one bikes I have is seven.

    A road bike, a cyclocross bike, a dual-suspension mountain bike, a touring/commuting bike, a bikepacking bike, a folding bike, and an e-bike for shopping and commuting.

    And the reason that this method holds up to the vicissitudes of life is that even though I have bikes for specific purposes, each of those bikes are actually quite versatile, and can easily fill the roles adjacent to their purpose.

    So here we go. A complete rundown of the Briztreadley stable of bicycles, where they came from, and how long I have owned them, and what each one means to me.

    I’m going to do this as a series of posts, probably over a few weeks. I probably won’t “announce” it until its all finished.

    • My bikepacking bike: the Carve 29er
    • My touring/commuting bike: the Sholto
    → 10:15 AM, Jan 17
  • Get in the drops

    Road bikes and cyclocross bikes and gravel bikes and all-road bikes all come with drop bars.

    But most riders of these bikes that I see out and about don’t take advantage of the benefits that drop bars offer.

    I ride on the road with a couple of different bunches. And I race cyclocross at Qld CX events. And I ride around Brisbane and SEQ a lot. And I would say 90-95 percent of riders I see almost never use the drops.

    There are two major benefits of riding in the drops:

    • more aerodynamic position than on the hoods
    • better control when braking and descending

    And there’s one reason that most bike riders don’t use the drops:

    • their sub-optimal bike setup means that its not comfortable

    So what do you get out of being able to use the drops as an option when riding road or cyclocross or gravel?

    Well, firstly it’s an option. I don’t ever spend a whole ride, or even a whole race, in the drops. Hands on the hoods, elbows relaxed and bent, is still the most common position for me when on either the road bike or the cyclocross (CX) bike.

    But there are two situations when I always move to the drops, and a third when there is also benefit to being down there.

    The first situation is descending, whether on bitumen or gravel.

    Before I go any further, I have to credit Anthony Mortimore as the person who explained these principles to me in a comprehensive and convincing way. He runs an excellent weekend course on climbing and descending on the road bike. If you get to the end of this piece and want to put some of these ideas into action, do Anthony’s course (although it seems these days that you might have to go to New Zealand to do it). It will make you a better, safer, faster rider.

    So, when descending on a road bike or CX bike, you want to be in a position that gives you the best control for braking and the most even or centred weight distribution. Being in the drops (assuming that your bike fit is correct) gives you a position on the bike that is low and centred (fore & aft), and also gives a grip on the handlebars that is able to withstand unexpected impacts from the road surface.

    If you descend with your hands on the brake hoods, as many riders do, a sudden hit to the bike from a pothole or bump in the road has the potential to weaken your grip or even dislodge it altogether. If you’re on the drops, the force of the same impact pushes your hands harder into the bars, rather than off them.

    The second advantage when descending in the drops is in braking force. If you are in the drops, you can brace your weight through your arms against the bars, and get your weight nice and low when you are braking. Doing the same manoeuvre from the hoods again puts you at risk of your grip weakening, and your hands sliding forward off the bars.

    The third advantage of this position when descending is that is gives you the best way of keeping your weight pushing down through your outside pedal, thus giving you the best possible traction, the best grip on the road.

    The second situation to be on the drops is when riding single track trails.

    This is probably only applicable to cyclocross or gravel bikes. I don’t think many people are taking to the trails in Gap Creek or Daisy Hill on their road bikes with 25mm tyres.

    But all of the advantages that being in the drops gives you when descending, are ramped up to the max when riding single track. For me, it is mostly about leverage to get the maximum braking power. Riding a cyclocross bike on single track is already very challenging. Riding it on the hoods is just asking for a crash.

    I’ve ridden my cyclocross bike on single track at Gap Creek, Daisy Hill and Underwood trails. And my experience of doing so merely emphasises to me that being in the drops is the position which gives the greatest level of control over your bike.

    And the third situation when I like to be on the drops is when riding in the road bunch on a windy day.

    Once again, there are situations in group riding where you want to be prepared for all eventualities, and also be as aero as possible. And that’s what being in the drops gives you, if your position is correctly set up.

    On a windy day the bunch tends to be blown around a bit, and positioning can be tricky. In most non-racing situations, the bunch should not set up in an echelon, because the echelon increases your width in the lane, and will appear from behind as through the bunch is much more than two-abreast.

    And so maintaining position in a cross-wind or a headwind in a two-abreast inline bunch requires greater concentration and your best ability to respond to a changing situation. As always, the solution to that is to be in the drops!

    To sum it all up: Katie f’n Compton rides in the drops. You could learn heaps from Katie f’n Compton.

    → 4:12 PM, Mar 27
  • RSS
  • JSON Feed
  • Micro.blog